🎊 👍 👍 Thank you for choosing to contribute to this project 👍 👍 🎊 We cherish your contributions, and want to make your contributing to this project smooth and transparent.
-
When contributing to this repository, please first discuss the change you wish to make via issue, email, or any other method with the owners of this repository before making a change.
-
Please note we have a code of conduct, please follow it in all your interactions with the project.
We use Github Flow, all code changes happen through Pull Requests. We actively welcome your pull requests. So here are the steps to achieve a successfull Pull Request.
You can get your own fork/copy of this project by using the Fork button.

You need to clone (download) it to local machine using
git clone https://github.com/Your_Username/react-auth-kit.git
This makes a local copy of the repository in your machine.
Once you have cloned the WhatsThere repository from GitHub, move to that folder first using change directory command.
This will change directory to the cloned repository
``` cd WhatsThere ```
Once you have completed these steps, you are ready to start contributing by checking our Help Wanted Issues and creating pull requests.
Whenever you are going to make a contribution, Please create a separate branch using command and keep your master branch clean (i.e. synced with remote branch).
git checkout -b Branch_Name
It will create a new branch with the name Branch_Name and will switch to that branch.
Install project dependencies using
npm install
🎉 Now comes coding time 🎉
To add the changes made to the branch. Use:
git add .
Type in a message relevant for the code reviewer using
git commit -m 'relevant message'
Now, Push your awesome work to your remote repository using
git push -u origin Branch_Name
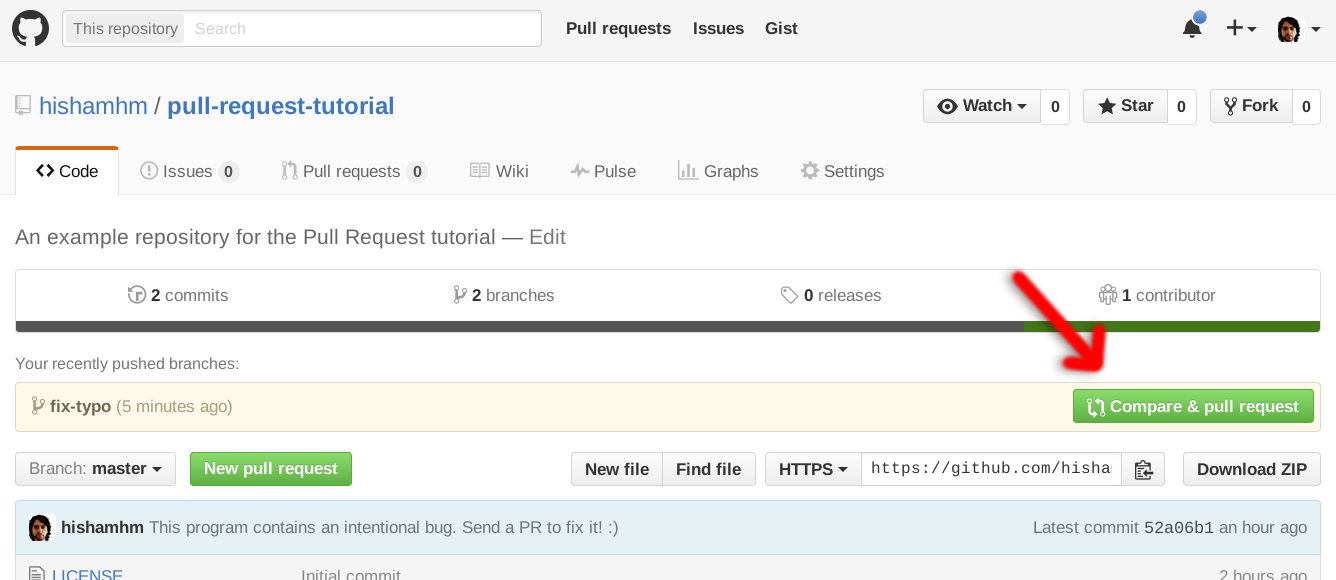
Finally, go to your forked repository in your browser and click on Compare & pull request.
😃Now, sit back and relax till we review your PR, you've made your contribution to our project.
- Ensure any install or build dependencies are removed before the end of the layer when doing a build.
- Update the README.md with details of changes to the interface, this includes new environment variables, exposed ports, useful file locations and container parameters.
- Increase the version numbers in any examples files and the README.md to the new version that this Pull Request would represent. The versioning scheme we use is SemVer.
- You may merge the Pull Request in once you have the sign-off of two other developers, or if you do not have permission to do that, you may request the second reviewer to merge it for you.