ProgrammingFirmware
Programming MAXREFDES178 means programming three processors one at a time. This can be done using a suitable DAPLink adapter. It is also possible to use an SD-Card and App-Switcher mechanism of MAXREFDES178.
If DAPLink debugger/programmer interface is used, the programming should be done in this order:
- Program MAX32666
- Program MAX78000 Video processor
- Program MAX78000 Audio processor
WARNING: If you are programming a board that already has MAX78000 Video and MAX78000 Audio firmware, make sure video (FaceID) and audio (KWS) are enabled and running. Start programming MAX78000 Video and MAX78000 Audio firmware first, then MAX32666. MAX78000 Video and MAX78000 Audio firmware go to sleep mode when disabled, which causes interruptions during programming.
-
Applications are loaded and run using OpenOCD. This section shows how to do this specifically with MSYS on Windows.
-
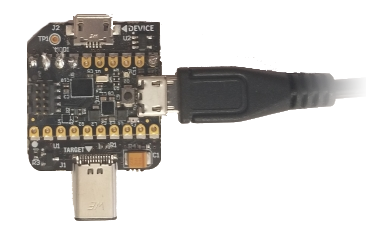
Connect a USB-Micro-B cable to the MAXDAP-TYPE-C HDK debugger (Pico) port. The Pico on the adaptor must be programmed with the
max32625pico_max32630hsp.binDAPLink image.
-
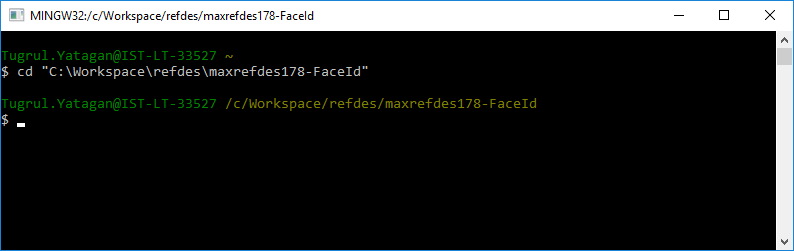
To load local builds (the binaries that you build on your PC):
- Open MinGW console and cd into one of the demo directories:
-
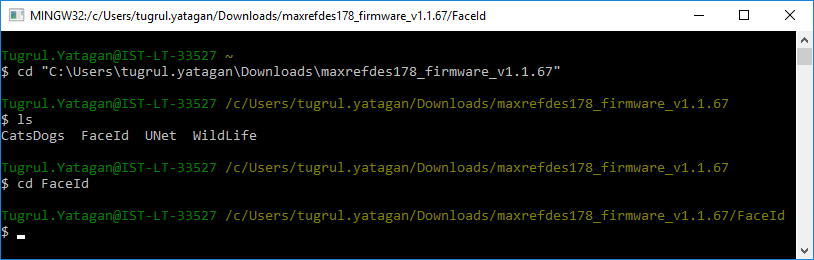
To load the prebuilt binaries:
- Download the latest
maxrefdes178_firmware.ziprelease and extract the content of the zip file.
- Download the latest
| Releases |
|---|
| Stable Releases: |
| https://github.com/MaximIntegratedAI/refdes/releases |
| Github Actions Builds: |
| https://github.com/MaximIntegratedAI/refdes/actions/workflows/maxrefdes178.yml |
- Open MinGW console, cd into the directory where the zip archive file is extracted and cd into one of the demo directories:
- Connect the debugger/programmer to the MAXREFDES178 Cube Camera
- Insert the MAXDAP-TYPE-C into MAXREFDES178 MAX32666 (first debug channel). The MAXDAP-TYPE-C and MAXREFDES178 cube camera lens should face same direction.
-
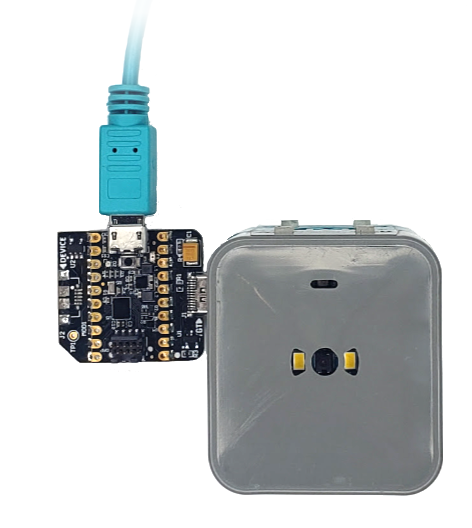
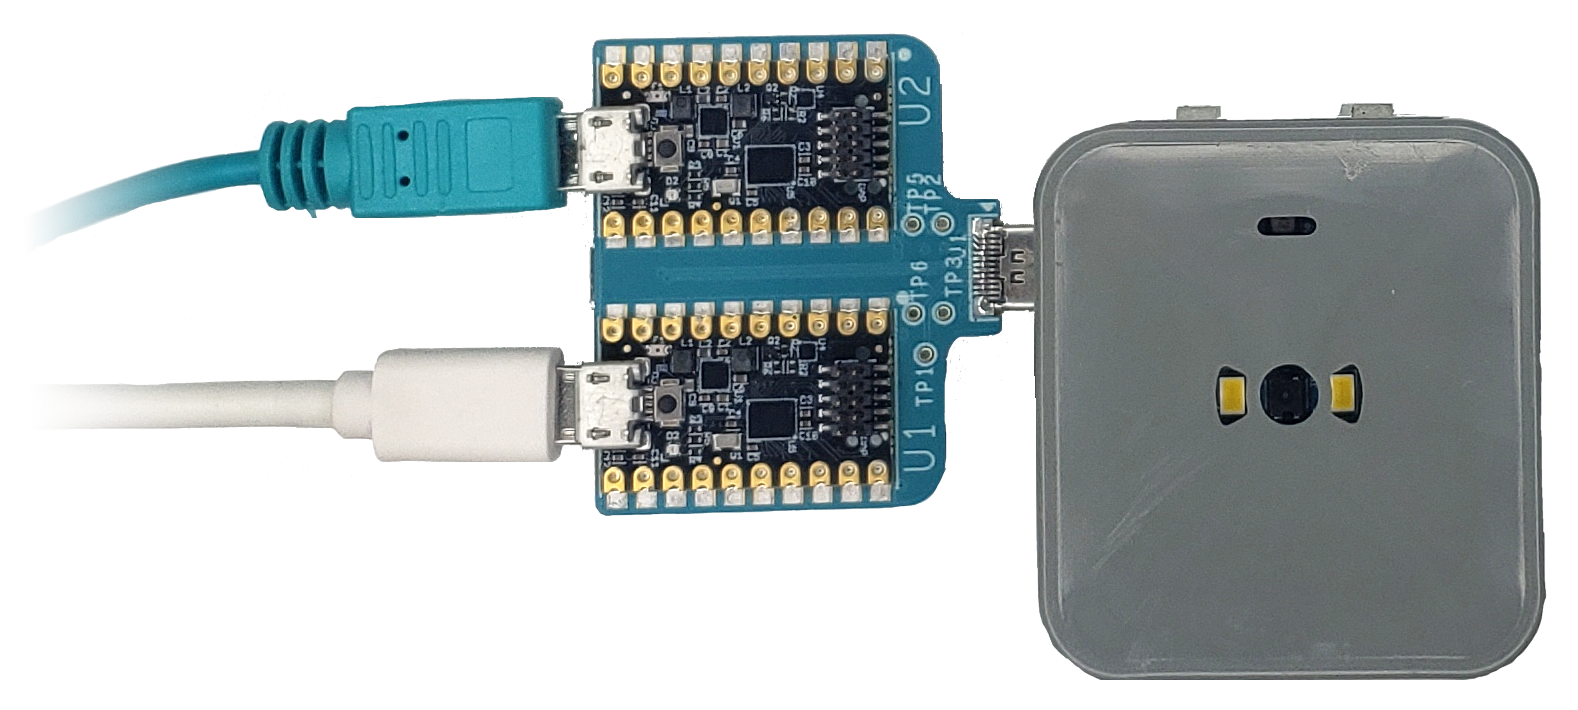
When MAXDAP-TYPE-C-DUAL is the debugger/programmer, insert to the MAXREFDES178 as shown in the picture. Both components of the MAXDAP-TYPE-C-DUAL and MAXREFDES178 cube camera lens are facing same direction.
Connect Micro-USB cable to U1 (first debug channel) of MAXDAP-TYPE-C-DUAL. In the picture, it is shown that a white Micro-USB cable is plugged in. Do not plug a USB cable into U2 (second debug channel) of MAXDAP-TYPE-C-DUAL. (Green cable in the picture shouldn't be connected)
- Program MAX32666 firmware using the provided script:
$ run.sh
NOTE: The script will start openocd tool with the following commands to update the firmware:
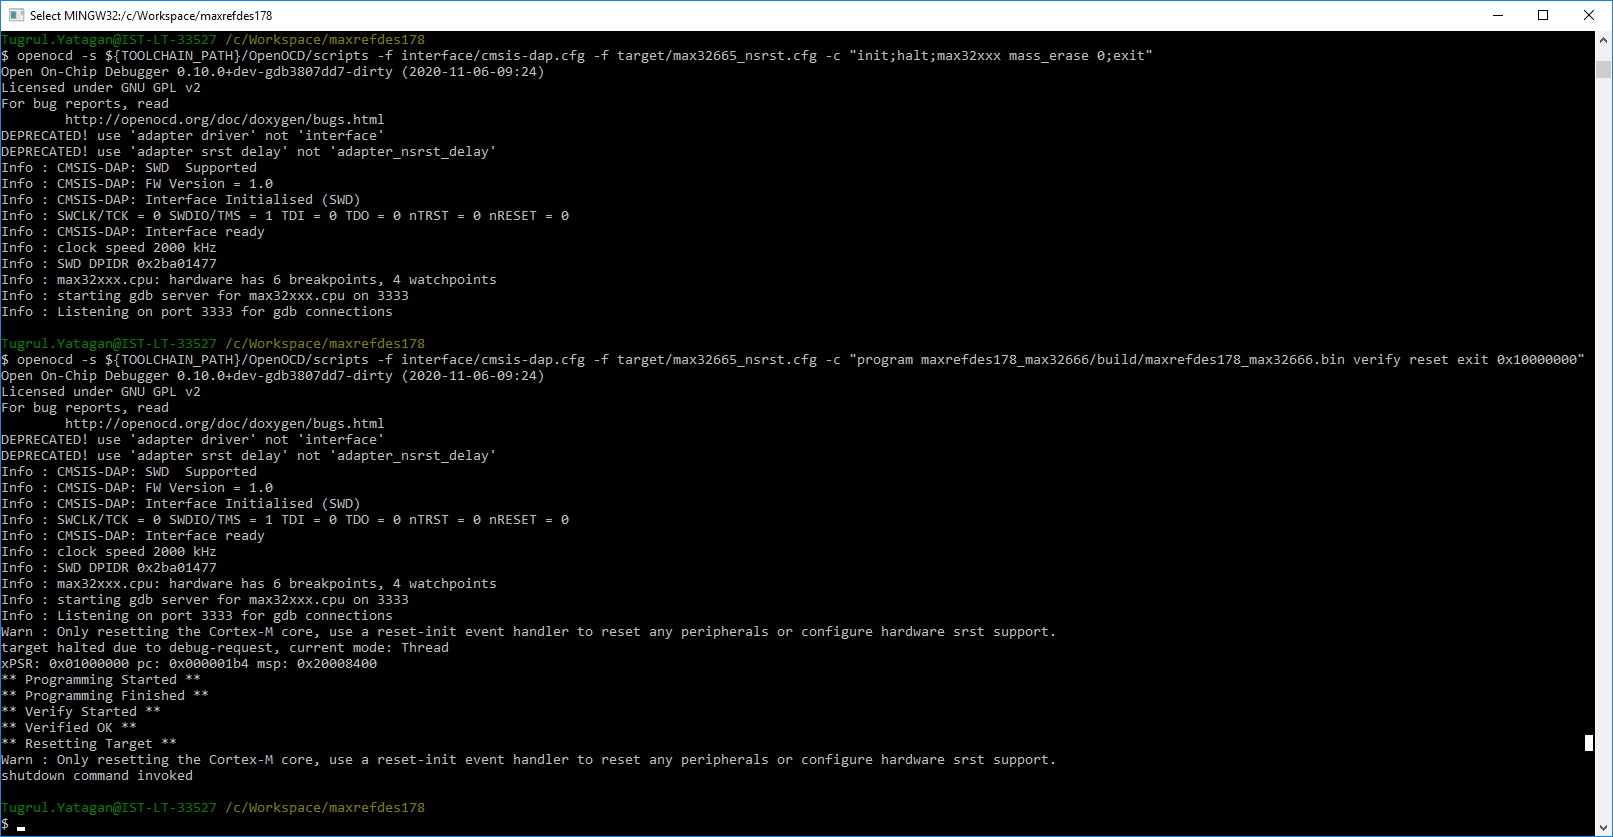
openocd -s ${TOOLCHAIN_PATH}/OpenOCD/scripts -f interface/cmsis-dap.cfg -f target/max32665_nsrst.cfg -c "init;halt;max32xxx mass_erase 0;exit"
openocd -s ${TOOLCHAIN_PATH}/OpenOCD/scripts -f interface/cmsis-dap.cfg -f target/max32665_nsrst.cfg -c "program maxrefdes178_max32666/build/maxrefdes178_max32666.bin verify reset exit 0x10000000"
- Successful MAX32666 firmware update output:
-
Press the ‘Y’ button to change the second debug channel to either MAX78000 Video or MAX78000 Audio.
-
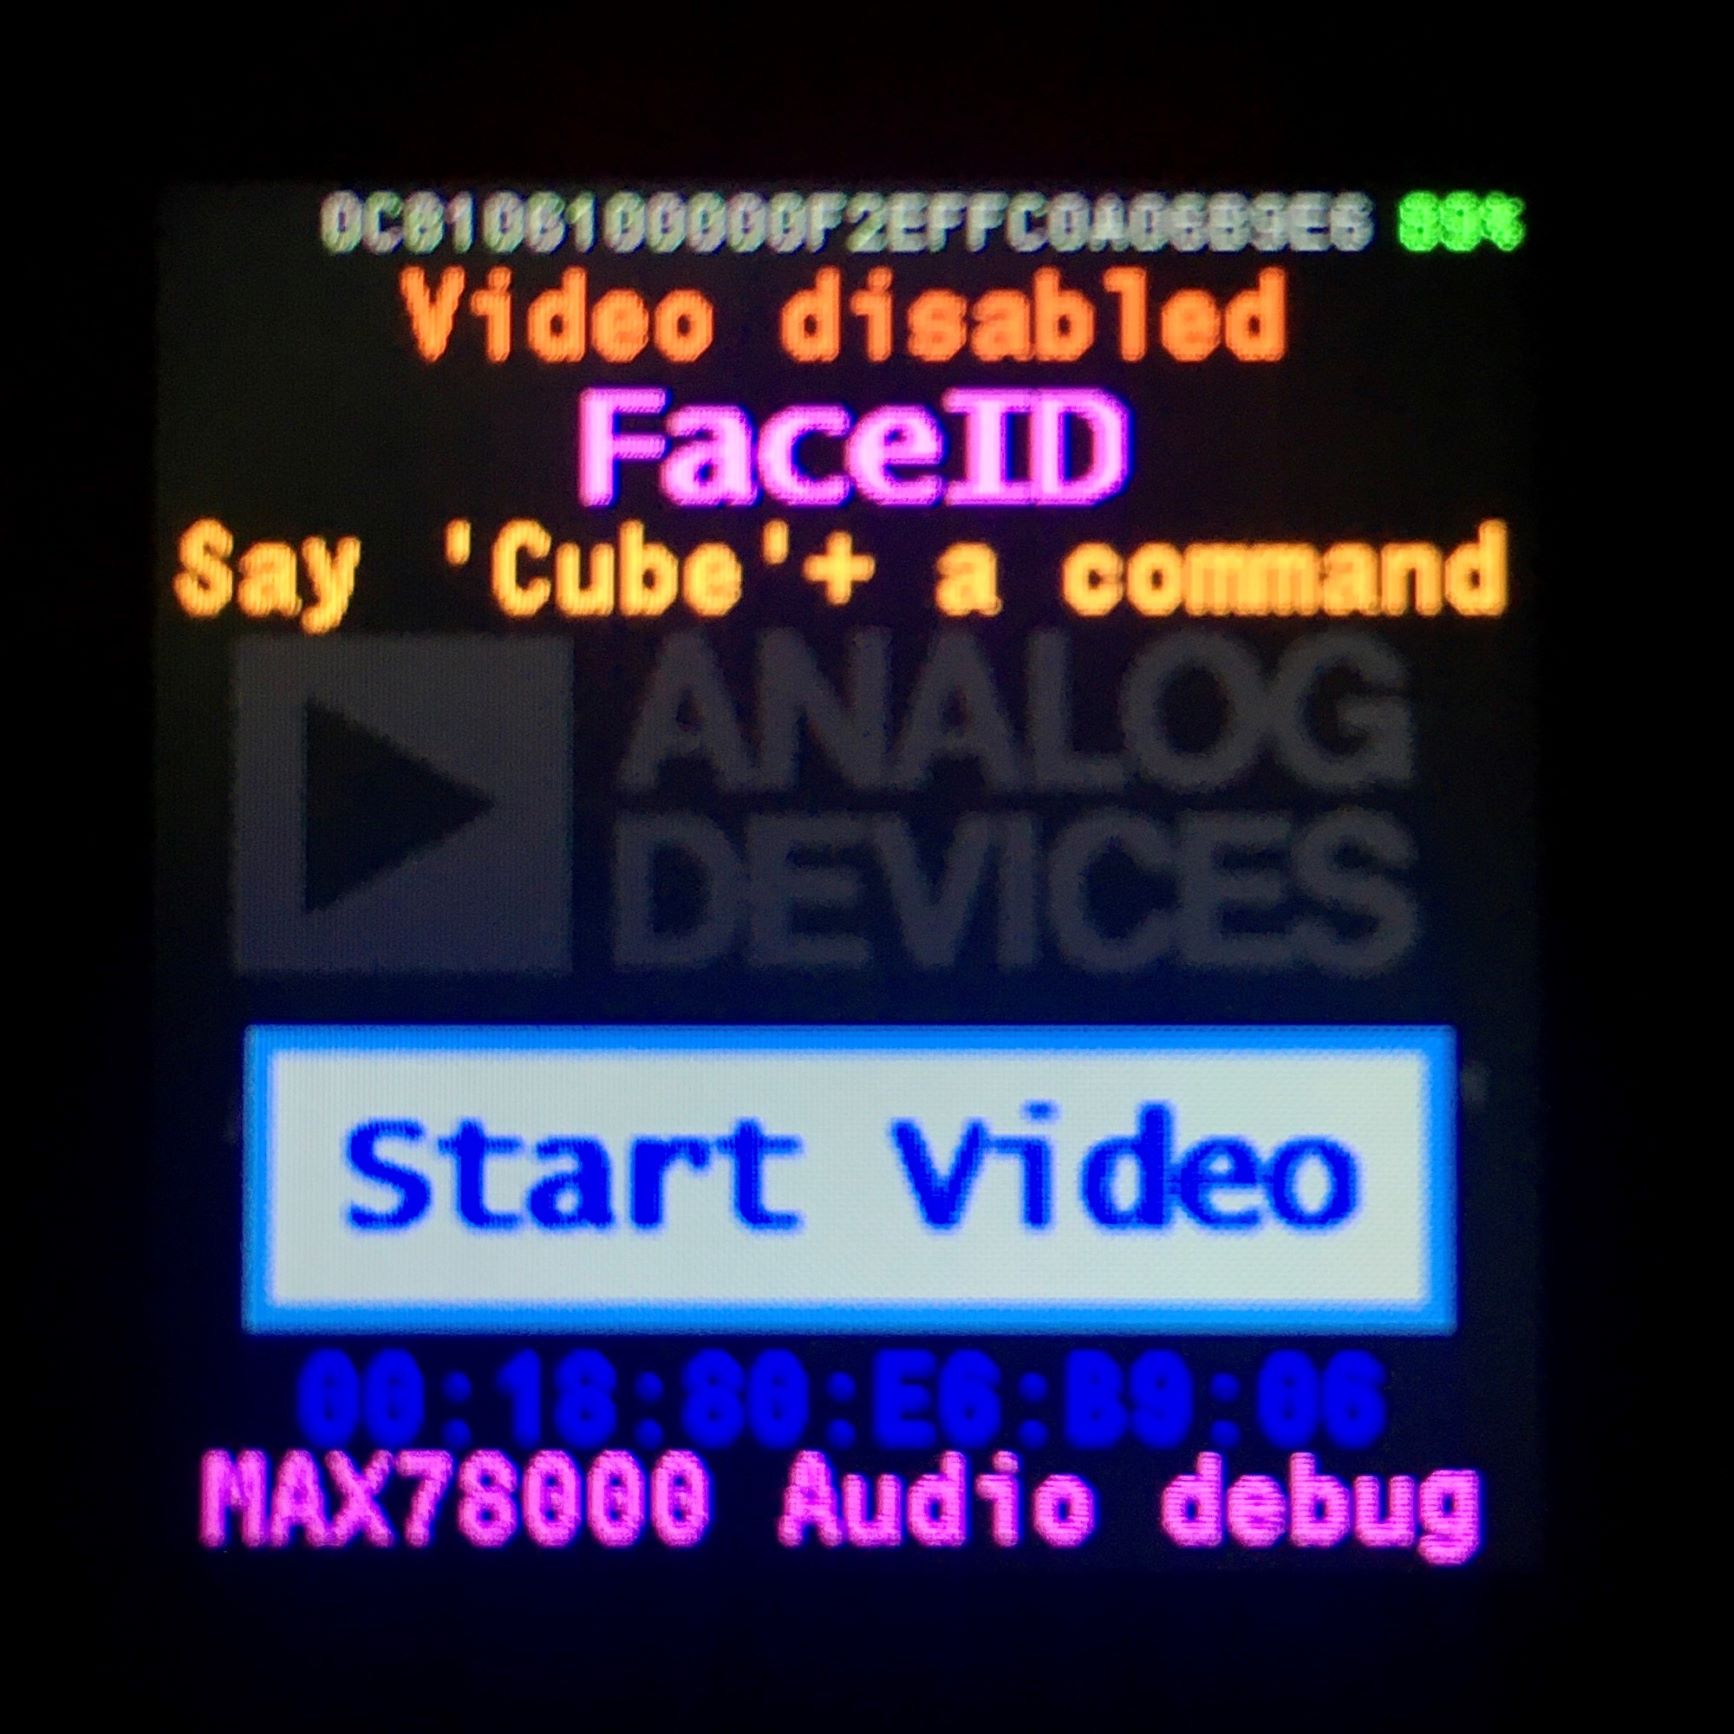
A notification at the bottom of the LCD will show the selected target:
| MAX78000 Video Debug Select | MAX78000 Audio Debug Select |
|---|---|
 |
 |
WARNING: If you are programming a board that already has MAX78000 Video firmware, make sure the video mode is enabled and running. MAX78000 Video firmware goes to sleep mode when disabled, which causes interruptions during programming.
NOTE: MAX32666 firmware should be loaded before this step.
-
Power cycle the MAXREFDES178 using the power button next to the USB Type-C connector.
-
Connect the debugger/programmer to the MAXREFDES178 Cube Camera
- Insert the MAXDAP-TYPE-C into MAXREFDES178 second debug channel. The MAXDAP-TYPE-C and MAXREFDES178 cube camera lens should face opposite directions.

-
When MAXDAP-TYPE-C-DUAL is the debugger/programmer, insert to the MAXREFDES178 as shown in the picture. Both components of the MAXDAP-TYPE-C-DUAL and MAXREFDES178 cube camera lens are facing the same direction.
Connect Micro-USB cable to U2 (second debug channel) of MAXDAP-TYPE-C-DUAL. In the picture, it is shown that a green Micro-USB cable is plugged in. Do not plug a USB cable to U2 (first debug channel) of MAXDAP-TYPE-C-DUAL. (White cable in the picture shouldn't be connected)
WARNING:** Connecting the MAXDAP-TYPE-C or MAXDAP-TYPE-C-DUAL adaptor with the wrong direction may cause the MAX78000 to become unresponsive and may require opening the camera and using the procedure described later to recover.
- Select MAX78000 Video target with button ‘Y’. MAX78000 Video will disable sleep mode for 30 seconds to prevent interruptions during programming. Be quick after selecting the target with the button ‘Y’.
- Program MAX78000 Video firmware using the provided script:
$ run.sh
NOTE: The script will start openocd tool with the following commands to update the firmware:
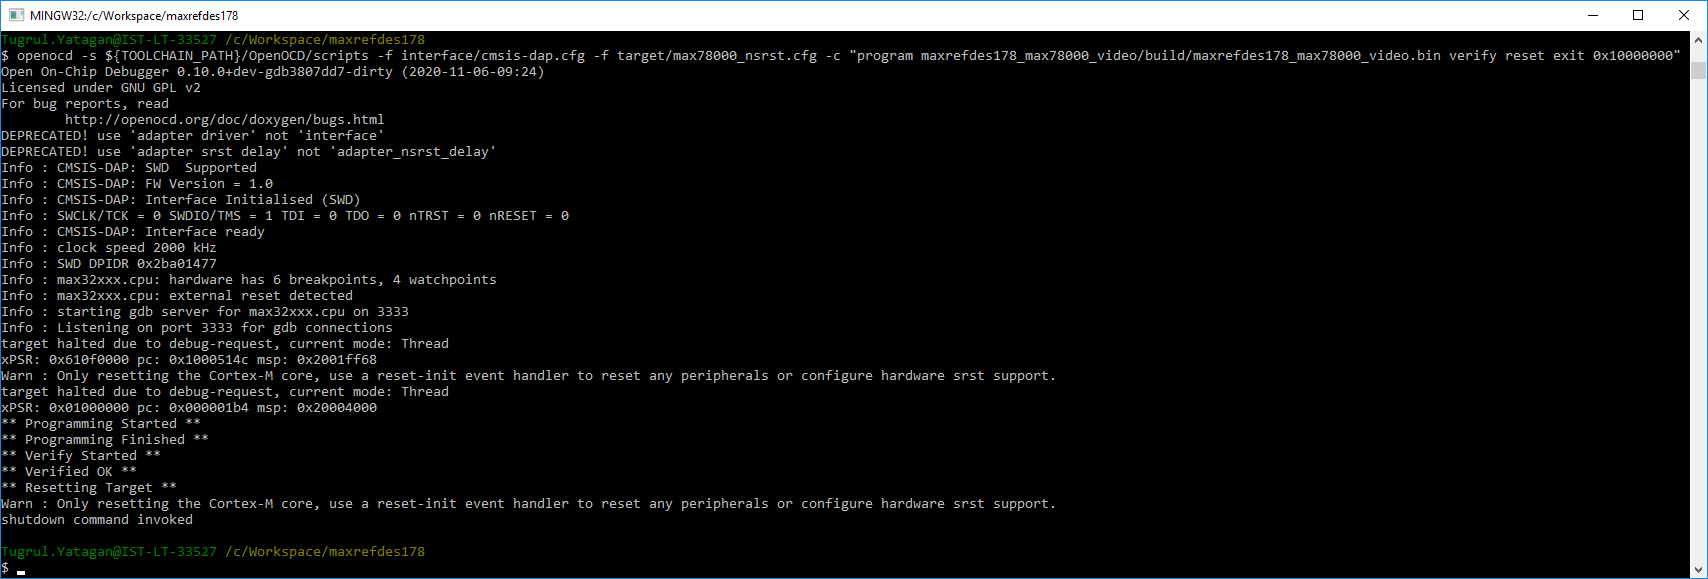
openocd -s ${TOOLCHAIN_PATH}/OpenOCD/scripts -f interface/cmsis-dap.cfg -f target/max78000_nsrst.cfg -c "program maxrefdes178_max78000_video/build/maxrefdes178_max78000_video.bin verify reset exit 0x10000000"
- Successful MAX78000 Video firmware update output:
NOTE: If the firmware update fails or OpenOCD crashes repeatedly and you were unable to program the video or audio firmware, please erase the video or audio firmware using the MAX32625PICO Debugger as described in the “Recovering/Erasing Video or Audio Firmware Using MAX32625PICO” section.
NOTE: MAX32666 firmware should be loaded before this step.
-
Power cycle the MAXREFDES178 using the power button next to the USB Type-C connector.
-
Connect the debugger/programmer to the MAXREFDES178 Cube Camera
- Insert the MAXDAP-TYPE-C into MAXREFDES178 second debug channel. The MAXDAP-TYPE-C and MAXREFDES178 cube camera lens should face opposite directions.
-
When MAXDAP-TYPE-C-DUAL is the debugger/programmer, insert to the MAXREFDES178 as shown in the picture. Both components of the MAXDAP-TYPE-C-DUAL and MAXREFDES178 cube camera lens are facing the same direction.
Connect Micro-USB cable to U2 (second debug channel) of MAXDAP-TYPE-C-DUAL. In the picture, it is shown that a green Micro-USB cable is plugged in. Do not plug a USB cable to U2 (first debug channel) of MAXDAP-TYPE-C-DUAL. (White cable in the picture shouldn't be connected)
WARNING: Connecting the MAXDAP-TYPE-C or MAXDAP-TYPE-C-DUAL adaptor with the wrong direction may cause the MAX78000 to become unresponsive and may require opening the camera and using the procedure described later to recover.
- Select MAX78000 Audio target with button ‘Y’. MAX78000 Audio will disable sleep mode for 30 seconds to prevent interruptions during programming. Be quick after selecting the target with the button ‘Y’.
- Program MAX78000 Audio firmware using the provided script:
$ run.sh
NOTE: The script will start openocd tool with the following commands to update the firmware:
openocd -s ${TOOLCHAIN_PATH}/OpenOCD/scripts -f interface/cmsis-dap.cfg -f target/max78000_nsrst.cfg -c "program maxrefdes178_max78000_audio/build/maxrefdes178_max78000_audio.bin verify reset exit 0x10000000"
- Successful MAX78000 Audio firmware update output:
NOTE: If the firmware update fails or OpenOCD crashes repeatedly and you were unable to program the video or audio firmware, please erase the video or audio firmware using the MAX32625PICO Debugger as described in the “Recovering/Erasing Video or Audio Firmware Using MAX32625PICO” section.