-
Notifications
You must be signed in to change notification settings - Fork 0
Setup
Turmitor requires a fair amount of setup, and a lot of concrete (or other blocks). Follow the steps below to get Turmitor running on your world!
Note
This may not be fully up-to-date, as Turmitor is still in development. If you have any issues or notice anything missing, please let me know via an issue on the GitHub repository.
Turmitor can be fairly large, with a maximum CC terminal width of 51 (height is technically unbounded, but should be kept below 80 to avoid issues with overlapping communication channels). Each character is 6x9 pixels, so keep that in mind when deciding how large you want your Turmitor to be.
For an example, let's say we want to build a Turmitor that is a small 3x3 characters. In total, this would be 18x27 (486) pixels. For each pixel, you will need the following:
- A Turtle (with a pickaxe!)
- A Wired Modem (in full block form)
- One of each 16 different types of blocks (defaults to the 16 colors of concrete)
Thus, in order to build a 3x3 Turmitor, you will need 486 of each of the above items. In total, if we are counting from base resources, you would need:
- 1094 logs (2 logs per turtle + 0.25 logs per pickaxe)
- 3402 Iron Ingots (7 ingots per turtle)
- 1458 Diamonds (3 diamonds per pickaxe)
- 7290 Stone (7 stone per basic computer + 8 stone per modem)
- 186 Blocks of Glass (1 glass pane per basic computer -> 486 panes required, 16 panes per 6 blocks of glass)
- 972 Redstone (1 redstone per basic computer, 1 redstone per modem)
- 3904 Sand (4 sand per 8 concrete)
- 3904 Gravel (4 gravel per 8 concrete)
- 976 Dye (1 dye per 8 concrete, split equally into 16 colors)
Because of the high cost of building a Turmitor, it is highly recommended to plan how large you want it to be before actually committing.
Caution
The larger you build your Turmitor, the more it will lag. Unless you have express permission, please avoid building large Turmitor arrays on public servers.
Building the Turmitor is fairly forgiving. There are a few requirements, but overall it is fairly simple. The Turmitor must be built in a 2D plane, on any axis.
Horizontal Turmitors are Turmitors that are built on the XZ plane. These are mainly meant for map-art, as they can be easily viewed from above.
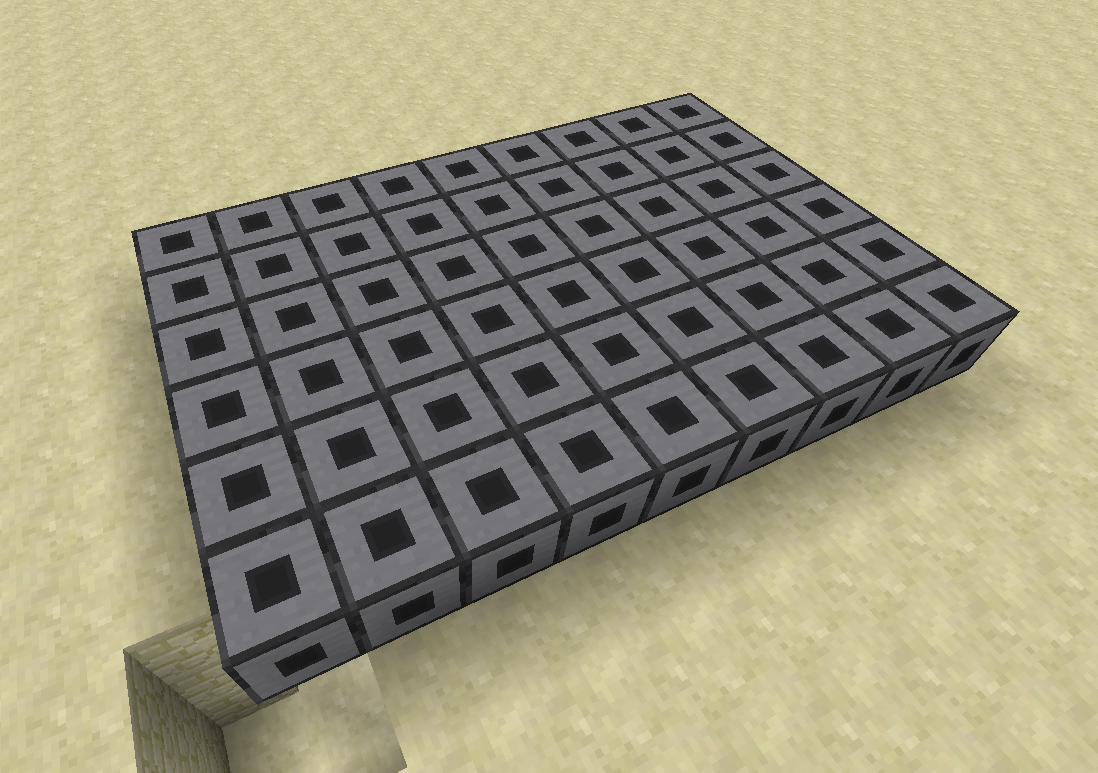
1. Place the modems
Place your array of modems flat in a rectangle. Pretty self explanatory.
Placement Example
2. Place the turtles
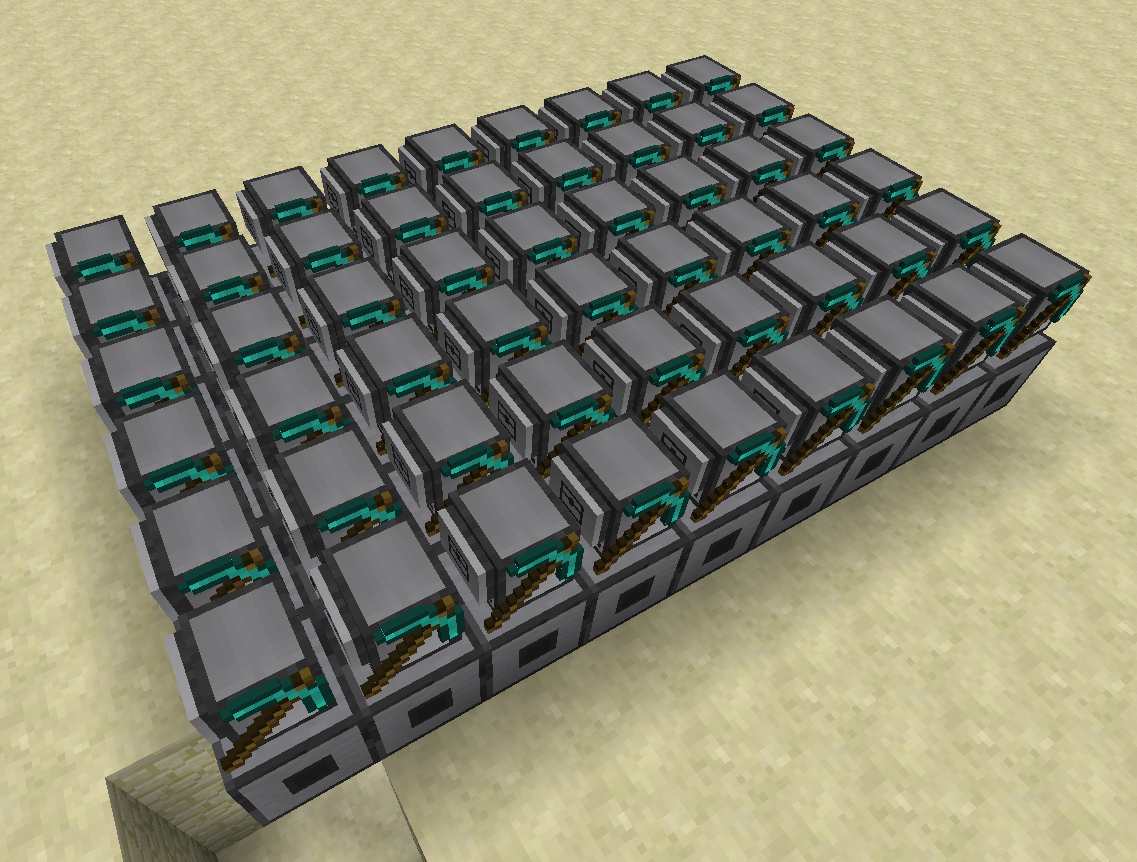
Directly on top of each modem, place a turtle. The turtle's facing does not matter, they will sort themselves out. Do not worry about putting concrete into the turtles manually, as that will be completed by the turtles themselves (unless you really want to pre-fill them, or use the command method mentioned).
Placement Example
Tip
To place a turtle with a pickaxe using a command (i.e: /fill or /setblock),
you can use the following as the block:
computercraft:turtle_advanced{RightUpgrade:"minecraft:diamond_pickaxe"}
And if you want to place a turtle with a pickaxe and all concrete pre-filled, you can use the following:
computercraft:turtle_advanced{Items: [{Slot: 0b, id: "minecraft:white_concrete", Count: 1b}, {Slot: 1b, id: "minecraft:light_gray_concrete", Count: 1b}, {Slot: 2b, id: "minecraft:gray_concrete", Count: 1b}, {Slot: 3b, id: "minecraft:black_concrete", Count: 1b}, {Slot: 4b, id: "minecraft:brown_concrete", Count: 1b}, {Slot: 5b, id: "minecraft:red_concrete", Count: 1b}, {Slot: 6b, id: "minecraft:orange_concrete", Count: 1b}, {Slot: 7b, id: "minecraft:yellow_concrete", Count: 1b}, {Slot: 8b, id: "minecraft:lime_concrete", Count: 1b}, {Slot: 9b, id: "minecraft:green_concrete", Count: 1b}, {Slot: 10b, id: "minecraft:cyan_concrete", Count: 1b}, {Slot: 11b, id: "minecraft:light_blue_concrete", Count: 1b}, {Slot: 12b, id: "minecraft:blue_concrete", Count: 1b}, {Slot: 13b, id: "minecraft:purple_concrete", Count: 1b}, {Slot: 14b, id: "minecraft:magenta_concrete", Count: 1b}, {Slot: 15b, id: "minecraft:pink_concrete", Count: 1b}], RightUpgrade: "minecraft:diamond_pickaxe"}
Do note that the above item name is extremely long, so will not fit in your chat window, you will need a command block or computer to run it.
3. Toggle the modems
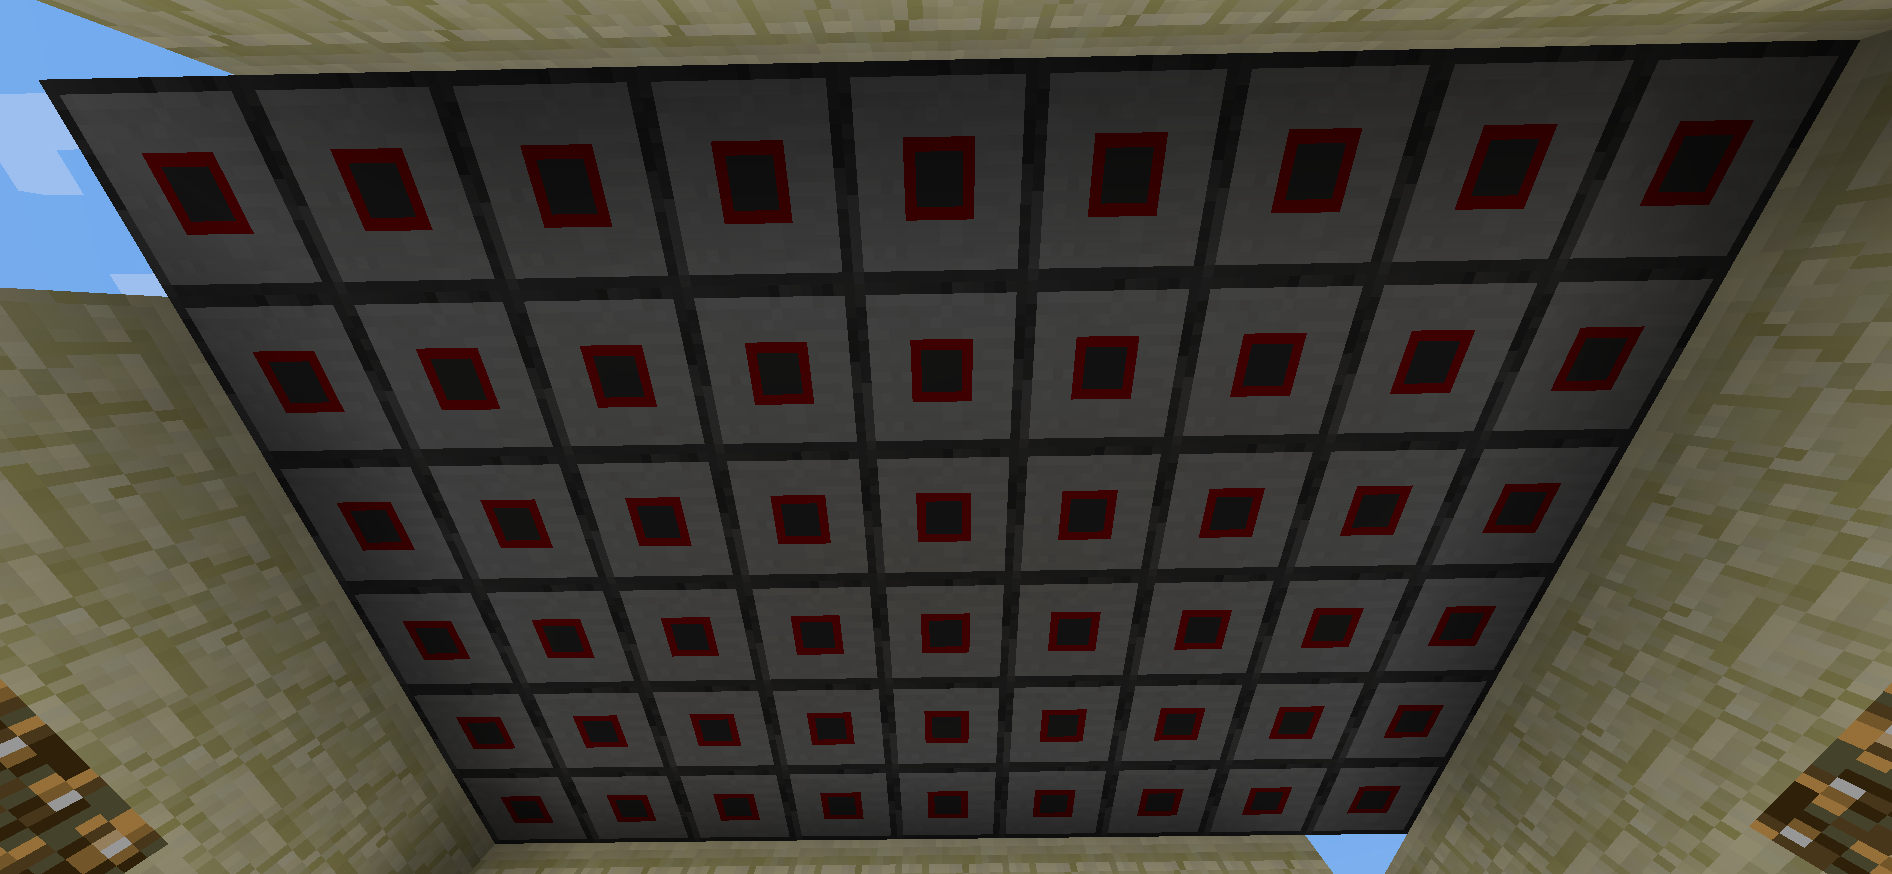
Right-click each modem so it states "turtle_x connected to network". The order you do this does not matter, just make sure to get them all!
Toggled Modems
4. Which way is up?
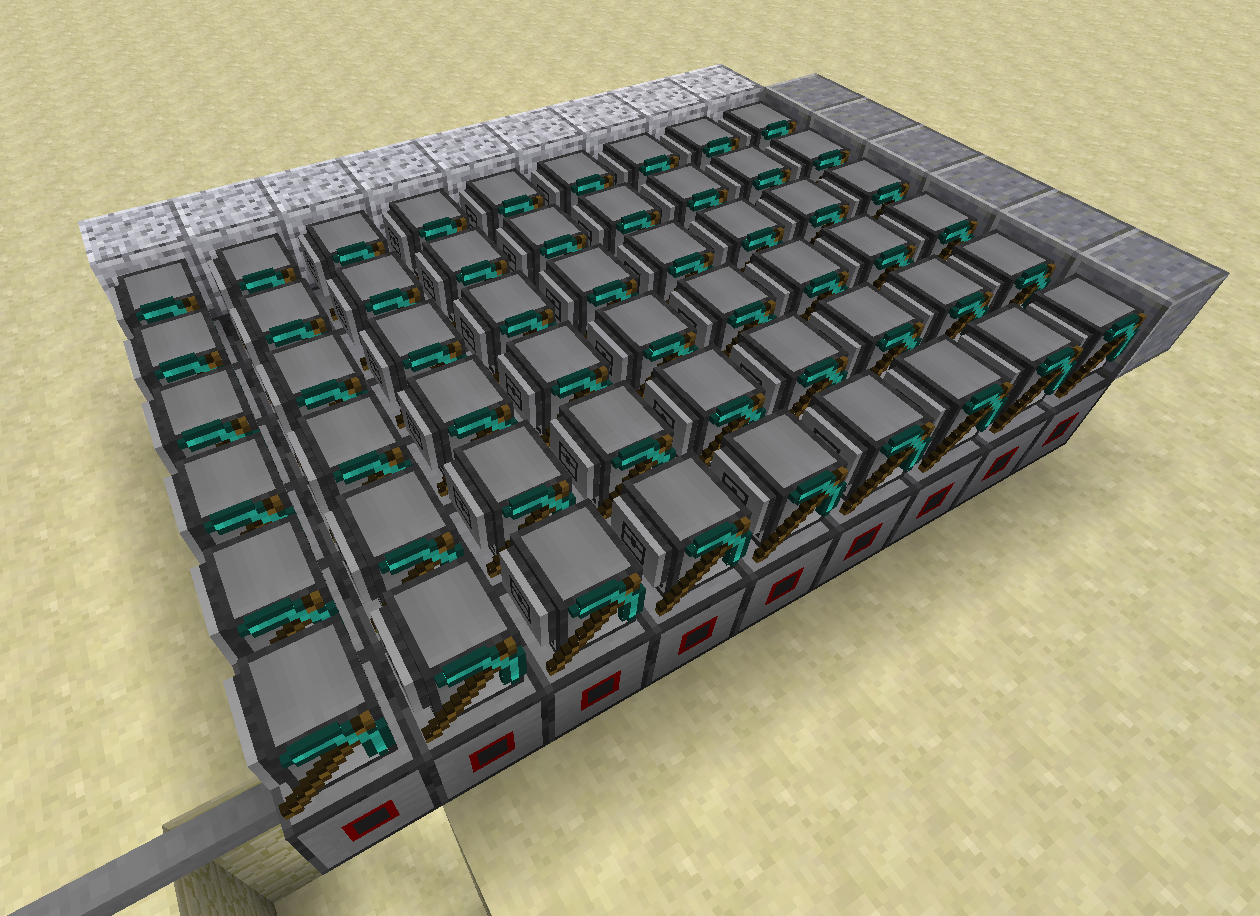
The turtles do not know what direction they are facing, so determine where the "top" of your Turmitor should be, and place polished andesite beside those turtles to indicate this. Place polished diorite beside the "left" turtles. With the andesite and diorite, the turtles will be able to orient themselves. Once the setup is complete, these blocks can be removed, though they will need to be replaced if you wish to resize the Turmitor.
Polished Andesite placed along the "top" and Polished Diorite along the "left"
5. Connect the controller
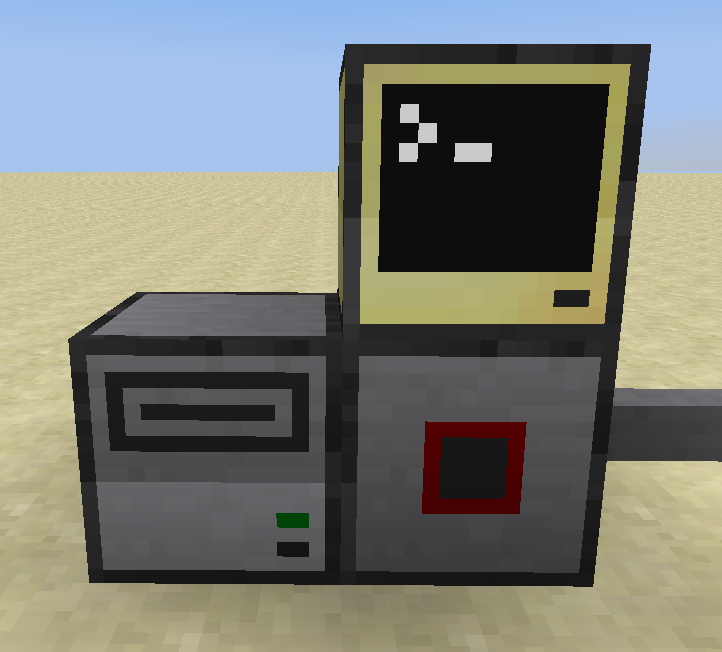
Wherever you want the controller to be, place some wires running to it. Connect a disk drive (with a disk), and a computer to act as the controller.
Controller Setup
Important
Make sure you remember to toggle the modem on the disk drive as well! Otherwise the turtles will not see the disk drive, and will not attempt to boot from it.
6. Install the software on the disk
wget run https://raw.githubusercontent.com/Fatboychummy-CC/Turmitor/main/installer.lua disk
7. Edit the disk's startup script
By default, the startup script will run in vertical mode. To change this,
uncomment the following line in disk/startup.lua:
-- turmitor_client.array_style = "horizontal"8. Run the setup
Run the setup program on the controller computer (initialize.lua), and follow
the prompts. This will set up the Turmitor and get it ready to display messages.
You will need to double-check your array at the end of the setup to ensure that
the turtles have organized themselves correctly, as sometimes (depending on the
server load or other factors) the turtles may not detect each other correctly.
What you'll be looking for is turtles that are not numbered sequentially, or if
the "bottom-right"-most turtle is not numbered as the size of the Turmitor (i.e:
if you have an array of 6x9 turtles, the bottom right turtle should be labelled
6,4)
In the event that there is an issue, you can just re-run the setup with the -r
flag, and it will reset the turtles before re-running the setup.
Vertical Turmitors are Turmitors that are built on the XY (or ZY) plane. Put simply, they go up. These are meant for wall displays and whatever else.
1. Place the modems
Place your array of modems in a vertical plane. Pretty self explanatory.
Placement Example

2. Place the turtles
Directly in front of each modem, place a turtle. The turtle's facing does not matter, they will sort themselves out. Do not worry about putting concrete into the turtles manually, as that will be completed by the turtles themselves (unless you really want to pre-fill them, or use the command method mentioned).
Placement Example

Tip
To place a turtle with a pickaxe using a command (i.e: /fill or /setblock),
you can use the following as the block:
computercraft:turtle_advanced{RightUpgrade:"minecraft:diamond_pickaxe"}
And if you want to place a turtle with a pickaxe and all concrete pre-filled, you can use the following:
computercraft:turtle_advanced{Items: [{Slot: 0b, id: "minecraft:white_concrete", Count: 1b}, {Slot: 1b, id: "minecraft:light_gray_concrete", Count: 1b}, {Slot: 2b, id: "minecraft:gray_concrete", Count: 1b}, {Slot: 3b, id: "minecraft:black_concrete", Count: 1b}, {Slot: 4b, id: "minecraft:brown_concrete", Count: 1b}, {Slot: 5b, id: "minecraft:red_concrete", Count: 1b}, {Slot: 6b, id: "minecraft:orange_concrete", Count: 1b}, {Slot: 7b, id: "minecraft:yellow_concrete", Count: 1b}, {Slot: 8b, id: "minecraft:lime_concrete", Count: 1b}, {Slot: 9b, id: "minecraft:green_concrete", Count: 1b}, {Slot: 10b, id: "minecraft:cyan_concrete", Count: 1b}, {Slot: 11b, id: "minecraft:light_blue_concrete", Count: 1b}, {Slot: 12b, id: "minecraft:blue_concrete", Count: 1b}, {Slot: 13b, id: "minecraft:purple_concrete", Count: 1b}, {Slot: 14b, id: "minecraft:magenta_concrete", Count: 1b}, {Slot: 15b, id: "minecraft:pink_concrete", Count: 1b}], RightUpgrade: "minecraft:diamond_pickaxe"}
Do note that the above item name is extremely long, so will not fit in your chat window, you will need a command block or computer to run it.
3. Toggle the modems
Right-click each modem so it states "turtle_x connected to network". The order you do this does not matter, just make sure to get them all!
Toggled Modems

4. Connect the controller
Wherever you want the controller to be, place some wires running to it. Connect a disk drive (with a disk), and a computer to act as the controller.
Controller Setup

5. Chests
Note
This step can be skipped if you pre-filled the turtles with concrete.
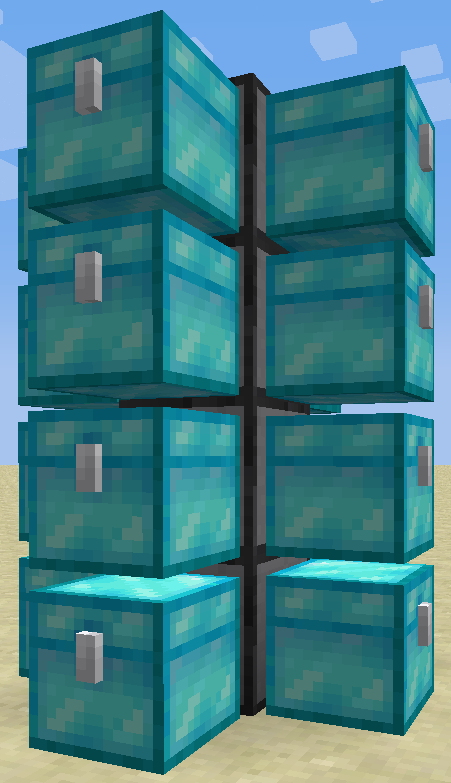
Connect one or more chests to your wired network, and in them place all of your concrete.
Chest Setup
6. Run the setup
Run the setup program on the controller computer (initialize.lua), and follow
the prompts. This will set up the Turmitor and get it ready to display messages.
You will need to double-check your array at the end of the setup to ensure that
the turtles have organized themselves correctly, as sometimes (depending on the
server load or other factors) the turtles may not detect each other correctly.
What you'll be looking for is turtles that are not numbered sequentially, or if
the "bottom-right"-most turtle is not numbered as the size of the Turmitor (i.e:
if you have an array of 6x9 turtles, the bottom right turtle should be labelled
6,4)
In the event that there is an issue, you can just re-run the setup with the -r
flag, and it will reset the turtles before re-running the setup.
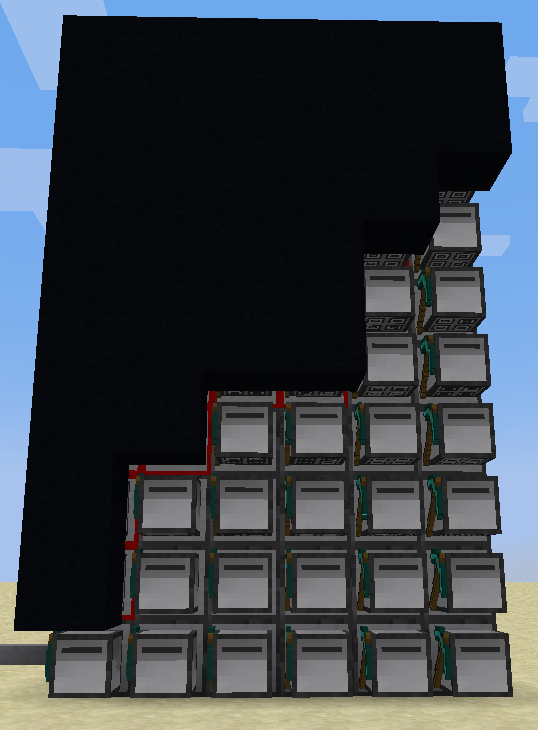
The turtles will turn to face the correct direction, then fill up with concrete (if they don't already have it), before finally placing black concrete in front of themselves.
When prompted, wait until all turtles have placed this black concrete block to continue.
Setup Running
Turmitor isn't actually quite a program, per se. The main controller is a
library, on which you can build things. However, the library can be
term.redirected to, so you can very easily run your own programs on the
Turmitor.
For a really basic example of this, see below:
-- Import the server library
local turmitor = require("turmitor_server")

-- Grab the redirect object.
local redirect = turmitor.get_terminal_interface()

-- Redirect the terminal to the Turmitor
local old_term = term.redirect(redirect)

-- Enable automatic updating (so we don't need to manually call redirect.flush())
redirect.auto_update()

-- Run the program
shell.run("my_program")

-- Redirect the terminal back once the program has finished
term.redirect(old_term)